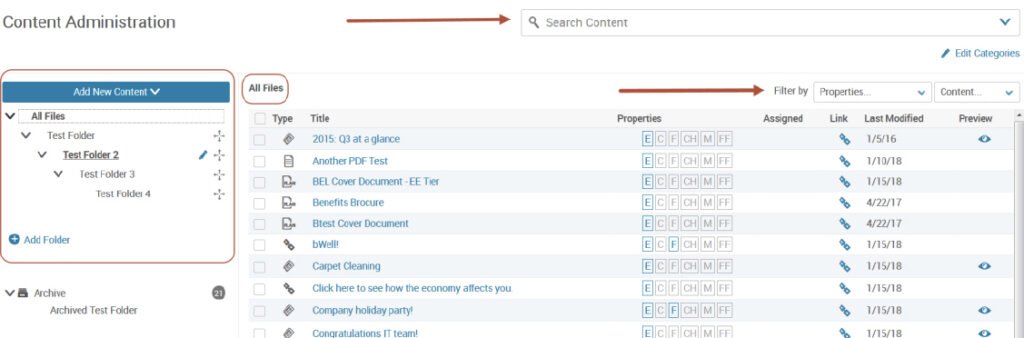
The main features of the Content Admin page are:
- The content organization panel, which shows the Library’s folder structure, and from which users can create new folders and add or upload new content.
- A search bar and content filters for finding specific content quickly and easily.
- A table listing the contents of each folder, in which users can click on any item to update the item’s content details.
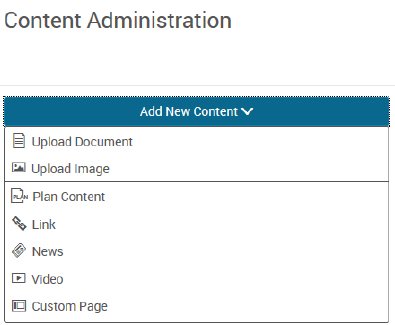
To upload documents to the library, click on the Add New Content button at the top left of the page and click on the type of document you would like to upload. See below for a brief description of each type.
| Type | Description |
|---|---|
| Plan Content | Documents that you would like to assign to plans. These documents will be viewable directly within the library, but also within the plan details for the assigned plan. |
| Link | Links that take Users to a new website. |
| Video | This content type can be used to display videos on employee and administrator homepages, as well as during enrollment (see Benefit Type Options >> Benefit Plan Type Video). Video content from the Library can be also be shown to employees before beginning enrollment using Ask Emma. Supported video file types are .mp4 and .flv. Please note: Flash videos (.flv) do not play on an iPad or iPhone. |
| News | The News content type is designed as an easy way to communicate important information such as upcoming company events, job postings, and announcements about benefits information. |
| Custom Page | Custom pages allow Administrators to create Library items that contain more text than a normal item, such as long text announcements, press releases, or blog posts. Custom pages provide advanced formatting options, increased page size, and the ability to include HTML links in a page. |
| Upload Document | This option can be used to upload documents. |
| Upload Image | This option can be used to upload images. |
When adding content via the Upload Document or Upload Image shortcuts, the selected files will appear in the Upload popup window.
The list of supported files and sizes is available in the Upload popup window by clicking the arrow next to File Requirements in the upper left corner.
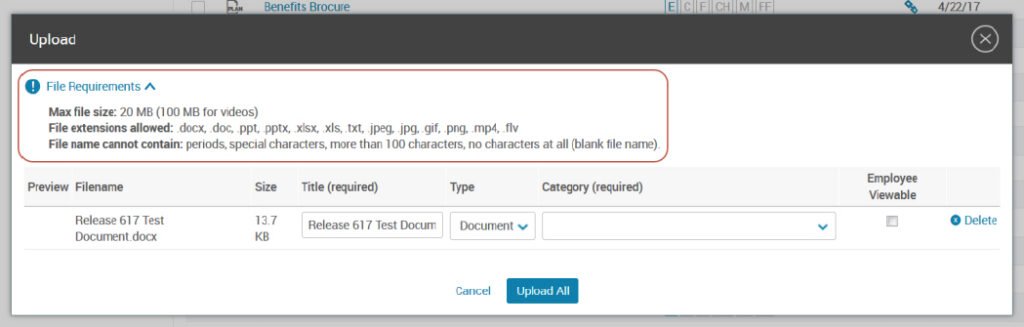
File requirements for uploads are as follows:
- Max file size: 20 MB (100 MB for videos)
- File extensions allowed: .docx, .doc, .ppt, .pptx, .xlsx, .xls, .txt, .jpeg, .jpg, .gif, .png, .mp4, .flv
- File name cannot contain: periods, special characters, more than 100 characters, no characters at all (blank file name)
Administrators can upload multiple files at once. If multiple files are selected, the system automatically detects the name the file was originally given, but a new title can be entered. Depending on the type of file uploaded, the system will assign the content to a content type (image, video, or document).
Administrators must assign the content to a specific category. To assign a category to uploaded content, select it from the Category dropdown in the popup window. Select whether or not the item should be viewed by employees, and click the Upload All button when complete. If an image is uploaded, a preview of the image will appear alongside the file name.
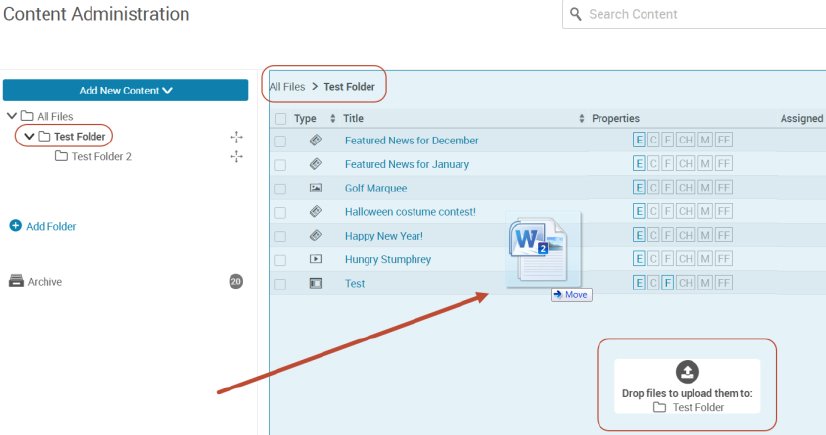
In addition to using the Add New Content menu, administrators can drag and drop documents, videos, and images directly from their local computer.
To upload items from your computer into Content Admin, open the folder in Content Admin that you want to add items to. Select the item or items from your computer, and then drag them to the content table panel. The panel will change to a light blue color and a message will appear at the bottom to indicate that the dragged items are ready to be dropped. The message also indicates which folder the new items are being added to. The folder name appears as well in bold in the panel on the left, and at the top of the table panel.
Drop the item anywhere in the table and the Upload popup window will appear, as above, where you select a category for the item and complete the upload process by clicking the Upload All button.
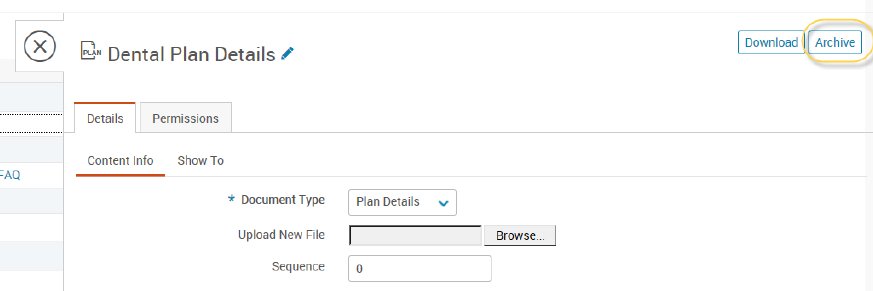
To remove content from the Library, from the Library home page, click on the document and click Archive. The Archive allows administrators to remove content from view in the Content Administrator library without actually deleting the content from the client site. Similar to the Recycle Bin feature on a computer, archived items are no longer viewable in the main Content Admin tables, but they haven’t been removed from the system. Archived content still exists and can be restored or permanently deleted.